
こんにちは!夜の街2Dアクションゲームを制作中の怪獣です🦖
前回の記事では、プレイヤーと、プレイヤーが立てる床を作成しました。

今回は 新しいInput System(InputAction)を使って、プレイヤーを左右に歩かせる処理を追加します!
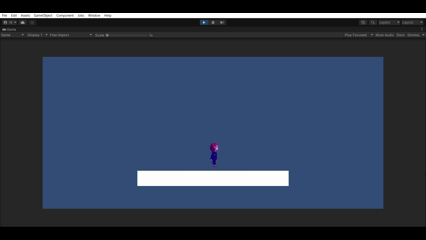
完成イメージ
←/→を押した際に、プレイヤーが左右に動く
手順
① Input Systemを導入する
Input Systemとは?
Unityでキャラクターを動かすときに必要なのが
「プレイヤーの入力(キーボードやコントローラー)」を取得する仕組みです。
その仕組みが Input System です。
ざっくり言うと、
「プレイヤーの操作をゲームに伝える仕組み」です。
例えば…
- ←キー → キャラが左に動く
- スペースキー → ジャンプ
- ゲームパッド → スティックで移動
こういった入力をまとめて扱うのが Input System です。
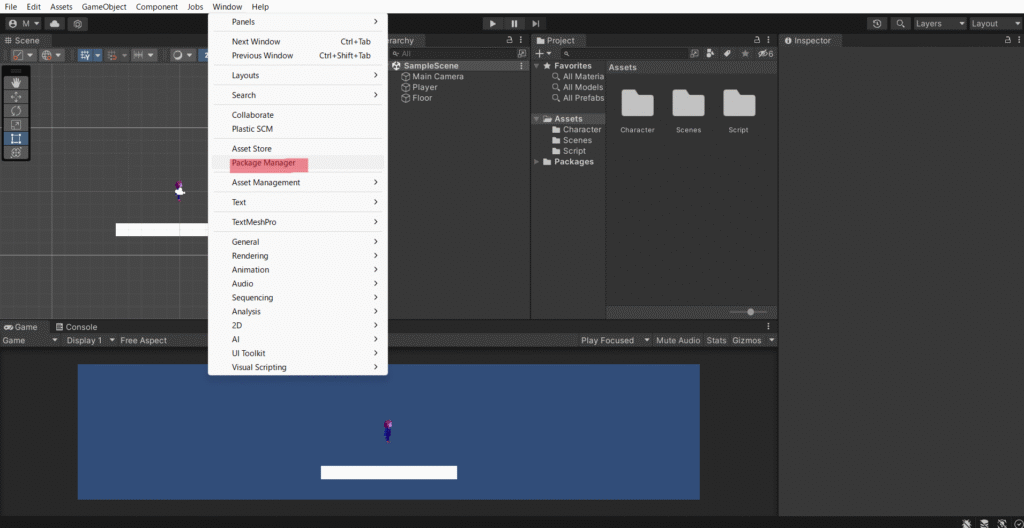
実際に処理を書いていく前に、どのキーやボタンでどんな動作をするかを設定するために、まずはInput Systemをインストールする必要があります。
1.メニューから Window → Package Manager を開く
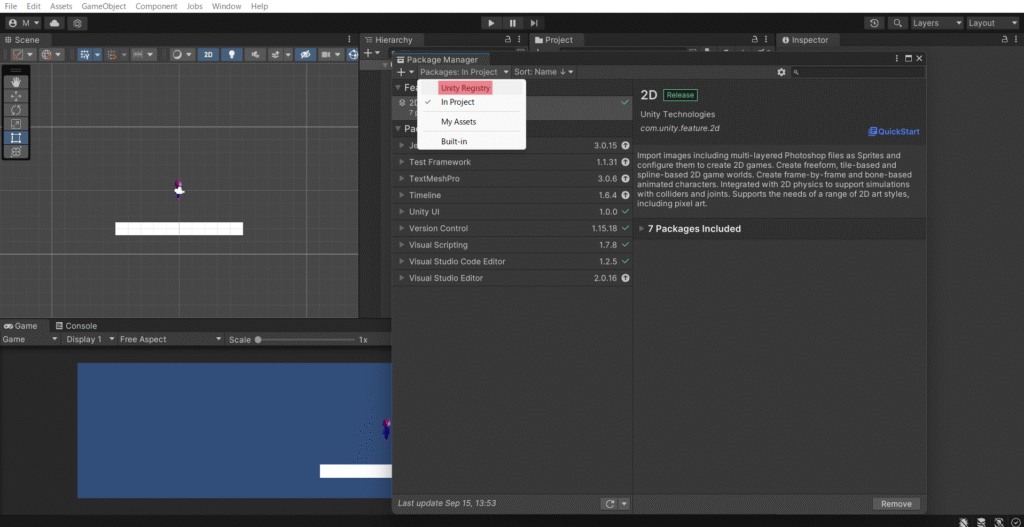
2.Unity Registry を選択する
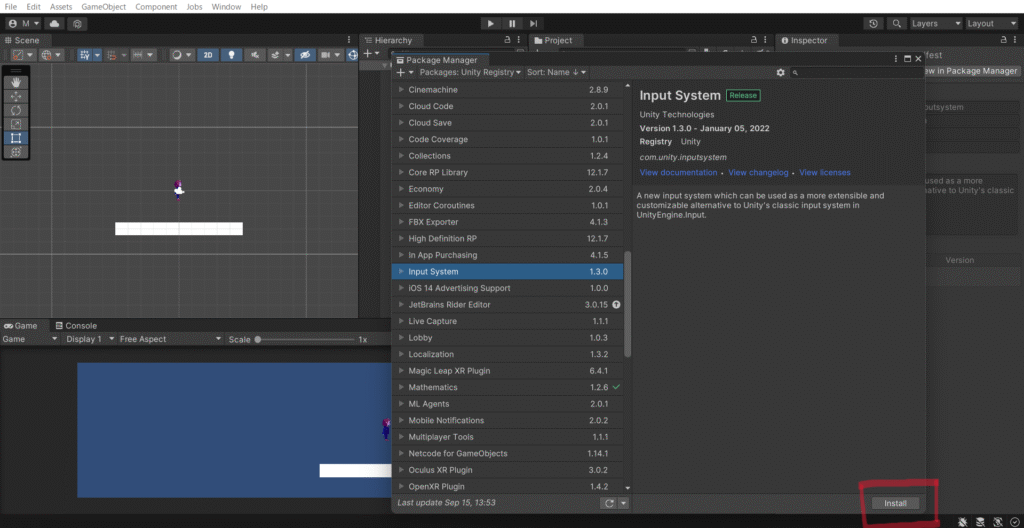
3.Input System をインストール。再起動を求められたら Yes を選んで再起動する
これで新しいInput Systemが使えるようになります!
②Playerオブジェクトにスクリプトを追加する
ソースコードを書くために、C#スクリプトを用意します。
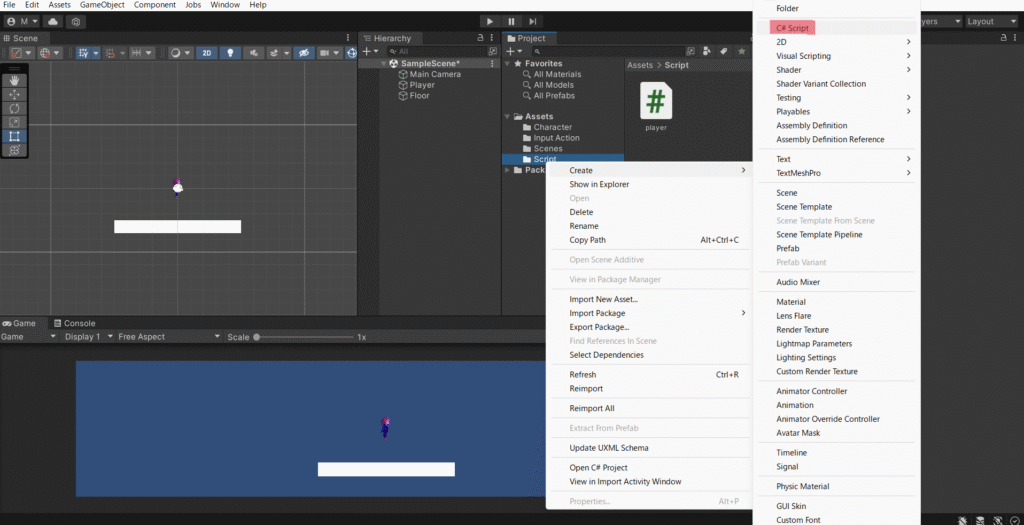
1.Assets配下にScript用のフォルダを作成し、 C#スクリプトを作成
・Player.cs
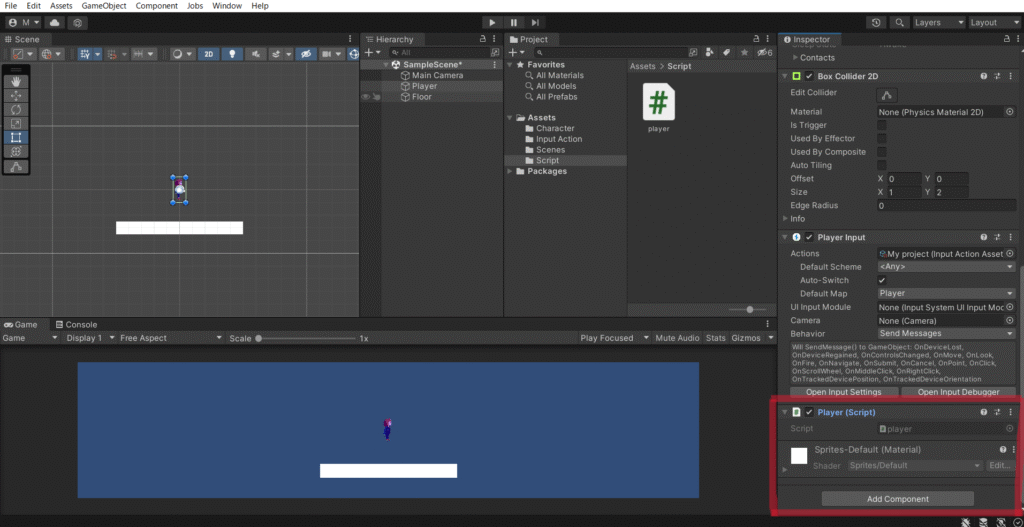
2.Playerオブジェクトを選択し、インスペクターの 「Add Component」 から Player.csを追加
③ 歩く処理のコードを書く
作成したPlayer.csを開きます。
using System.Collections;
using System.Collections.Generic;
using UnityEngine;
using UnityEngine.InputSystem;

public class Player : MonoBehaviour
{
    [SerializeField, Header("移動速度")]
    private float _moveSpeed = 5f;

    private Vector2 _inputDirection;
    private Rigidbody2D _rigid;

    void Start()
    {
        _rigid = GetComponent<Rigidbody2D>();
    }

    void Update()
    {
        _Move();
    }

    // 移動処理
    private void _Move()
    {
        _rigid.velocity = new Vector2(_inputDirection.x * _moveSpeed, _rigid.velocity.y);
    }

    // Input Systemから呼ばれる
    public void _OnMove(InputAction.CallbackContext context)
    {
        _inputDirection = context.ReadValue<Vector2>();
    }
}
- 「SerializeField」を定義することでUnity上の設定から直接調整ができます。
private Vector2 _inputDirection;- プレイヤーの入力(左右キー)を格納する変数。
- Input Systemなどで値を更新して使います。
_rigid.velocity = new Vector2(_inputDirection.x * _moveSpeed, _rigid.velocity.y);- Rigidbody2D の速度を直接変更し、キャラクターを移動。
x方向は入力値 × 移動速度、y方向はジャンプ処理など他の動きを残す。
④ InputActionアセットを作成する
1.ヒエラルキーで Player オブジェクトを選択
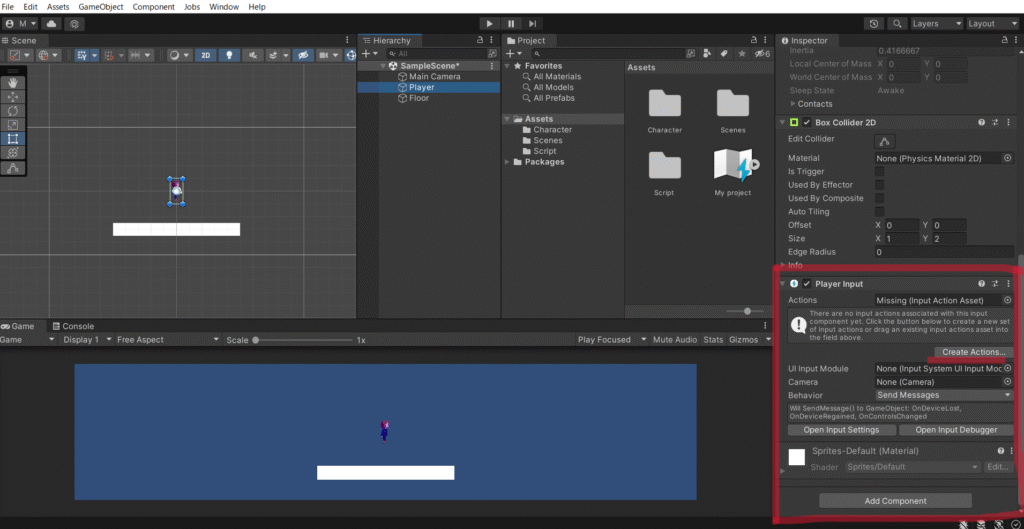
2.インスペクターの 「Add Component」 から Player Input を追加
3.「Actions」のところで「Create Actions」を押します
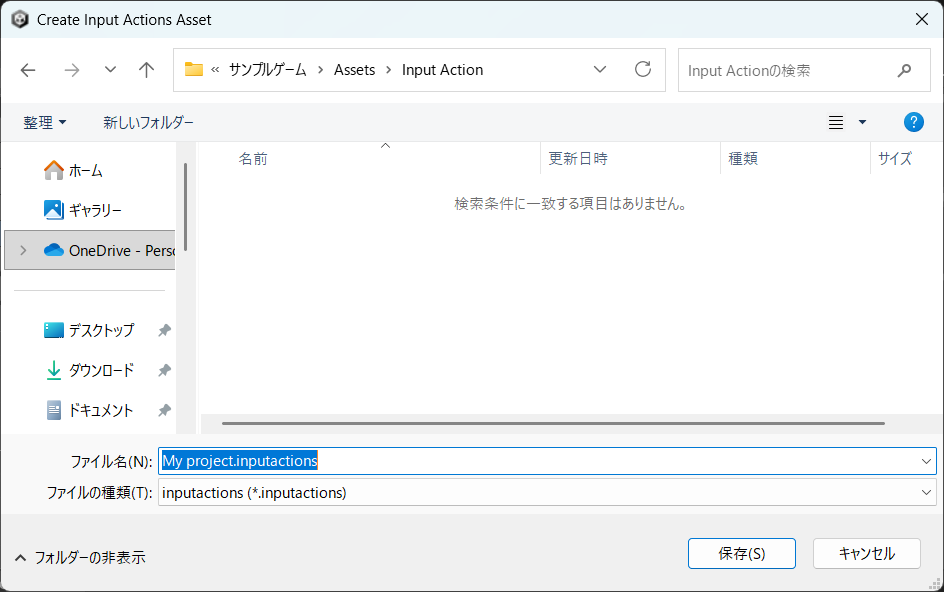
4.InputActionを保存する場所を求められるので、Assets配下にフォルダを作って格納する
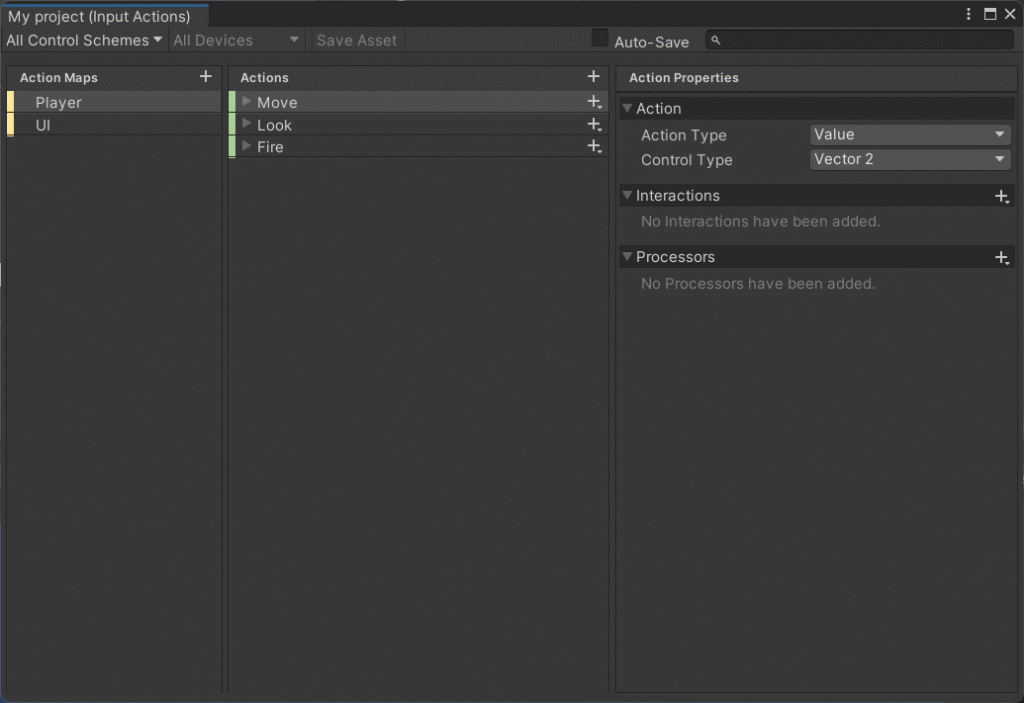
➡️ 作成したInputAcctionをクリックするとメニューが開きます。
➡️ Action Mapは「入力グループ」のようなものです。
(Player、UI、メニュー操作 など分けて作れる)
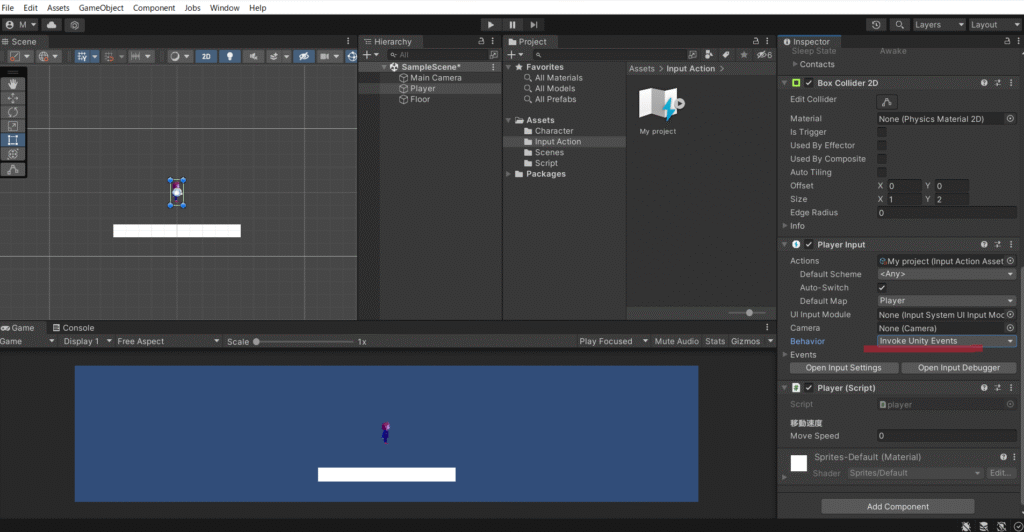
⑤ InputActionをPlayerに割り当てる
作ったInputActionをPlayerに充てていきましょう!
- ヒエラルキーの
Playerを選択 Player Inputコンポーネントを確認- Default Map →
Player - Behavior →
Invoke Unity Events(変更すると下にEventsが追加される)
- Default Map →
3.Events欄の「+」を押し、Playerオブジェクトをドラッグ
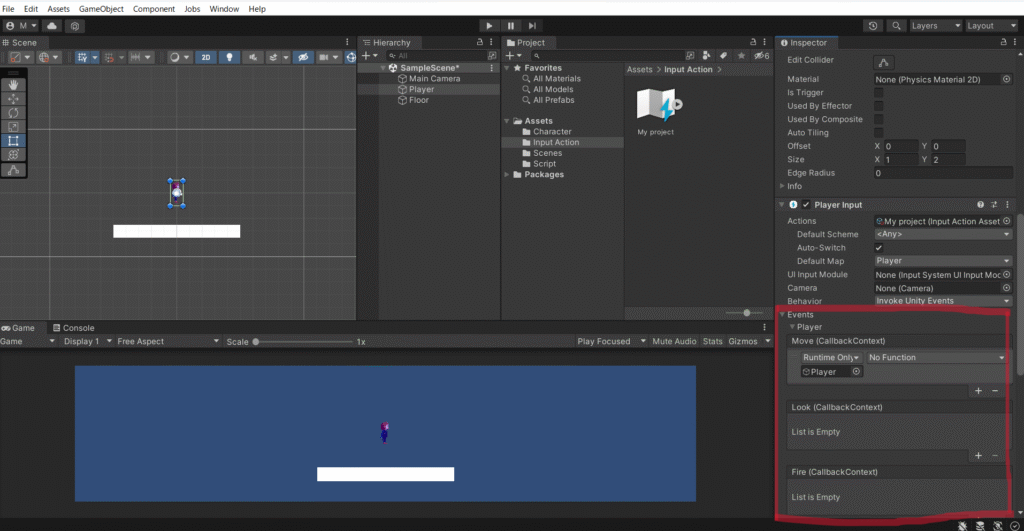
4.No Function をクリックし、Player → OnMove(InputAction.CallbackContext) を選択
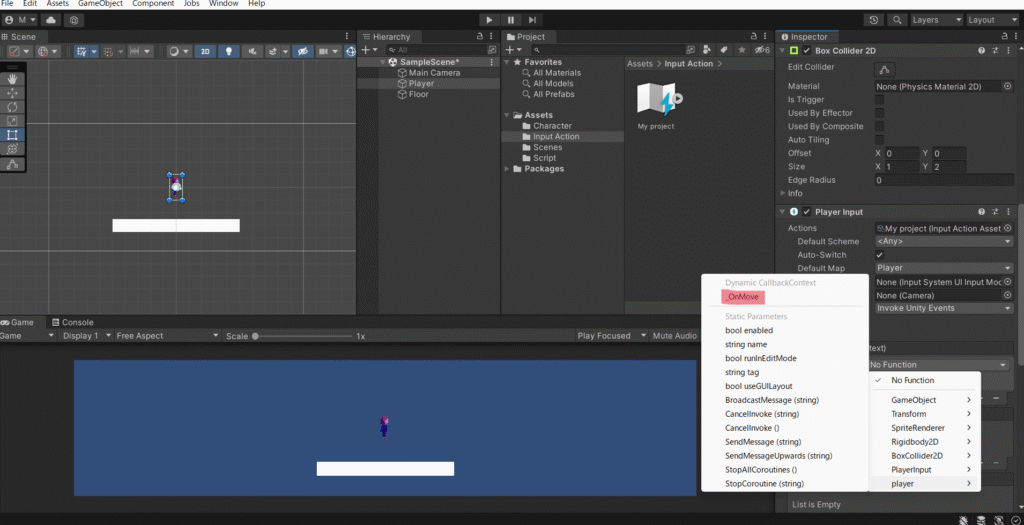
➡️ これで「Move」アクションが呼ばれると OnMove() が実行されます!
⑥実行してみる
- 再生ボタン ▶ を押す
←/→またはA/Dでプレイヤーが左右に歩きます
トラブルシューティング
- 動かない場合
Player InputコンポーネントにActionsが割り当てられているか確認Default MapがPlayerになっているか確認
- すり抜ける場合
- Player に Rigidbody2D と BoxCollider2D
- Ground に BoxCollider2D が設定されているか確認
まとめ
- Input Systemを導入して
InputActionを設定 OnMove()で入力値を受け取り、Rigidbody2Dの速度に反映- シンプルな「歩く処理」が完成
この記事では、プレイヤーを左右に移動させる処理の解説をしました。
このままだとプレイヤーが右に向いたままなので、次回の記事で左右に反転する処理を追加します!

コメント